Fit Tutorial: How to do aFull Bust Amendment
For the Springe Jumpsuit and Springe Dress Sewing Patterns

The Springe Jumpsuit Sewing Pattern and the Springe Dress Sewing Pattern are drafted for a sewing cup B, which means that there is a 5cm or 2 inch difference between the high bust and full bust measurement. If you have a larger difference, then you might find that you need to do a full bust amendment to get the best fit.
How do I know if I need an FBA?
The difference between your full bust and high bust measurements is more than 2 inches.
Your bust measurement is in a higher size than your waist measurement.
You find that fitted garments are usually too tight and pull your bust.
To adjust the pattern, you will need:
tape measure
scissors
scrap paper
tape
To make the sewing pattern adjustment, follow steps 1-9 below. The method is the same for all versions of the jumpsuit sewing pattern and dress sewing pattern.

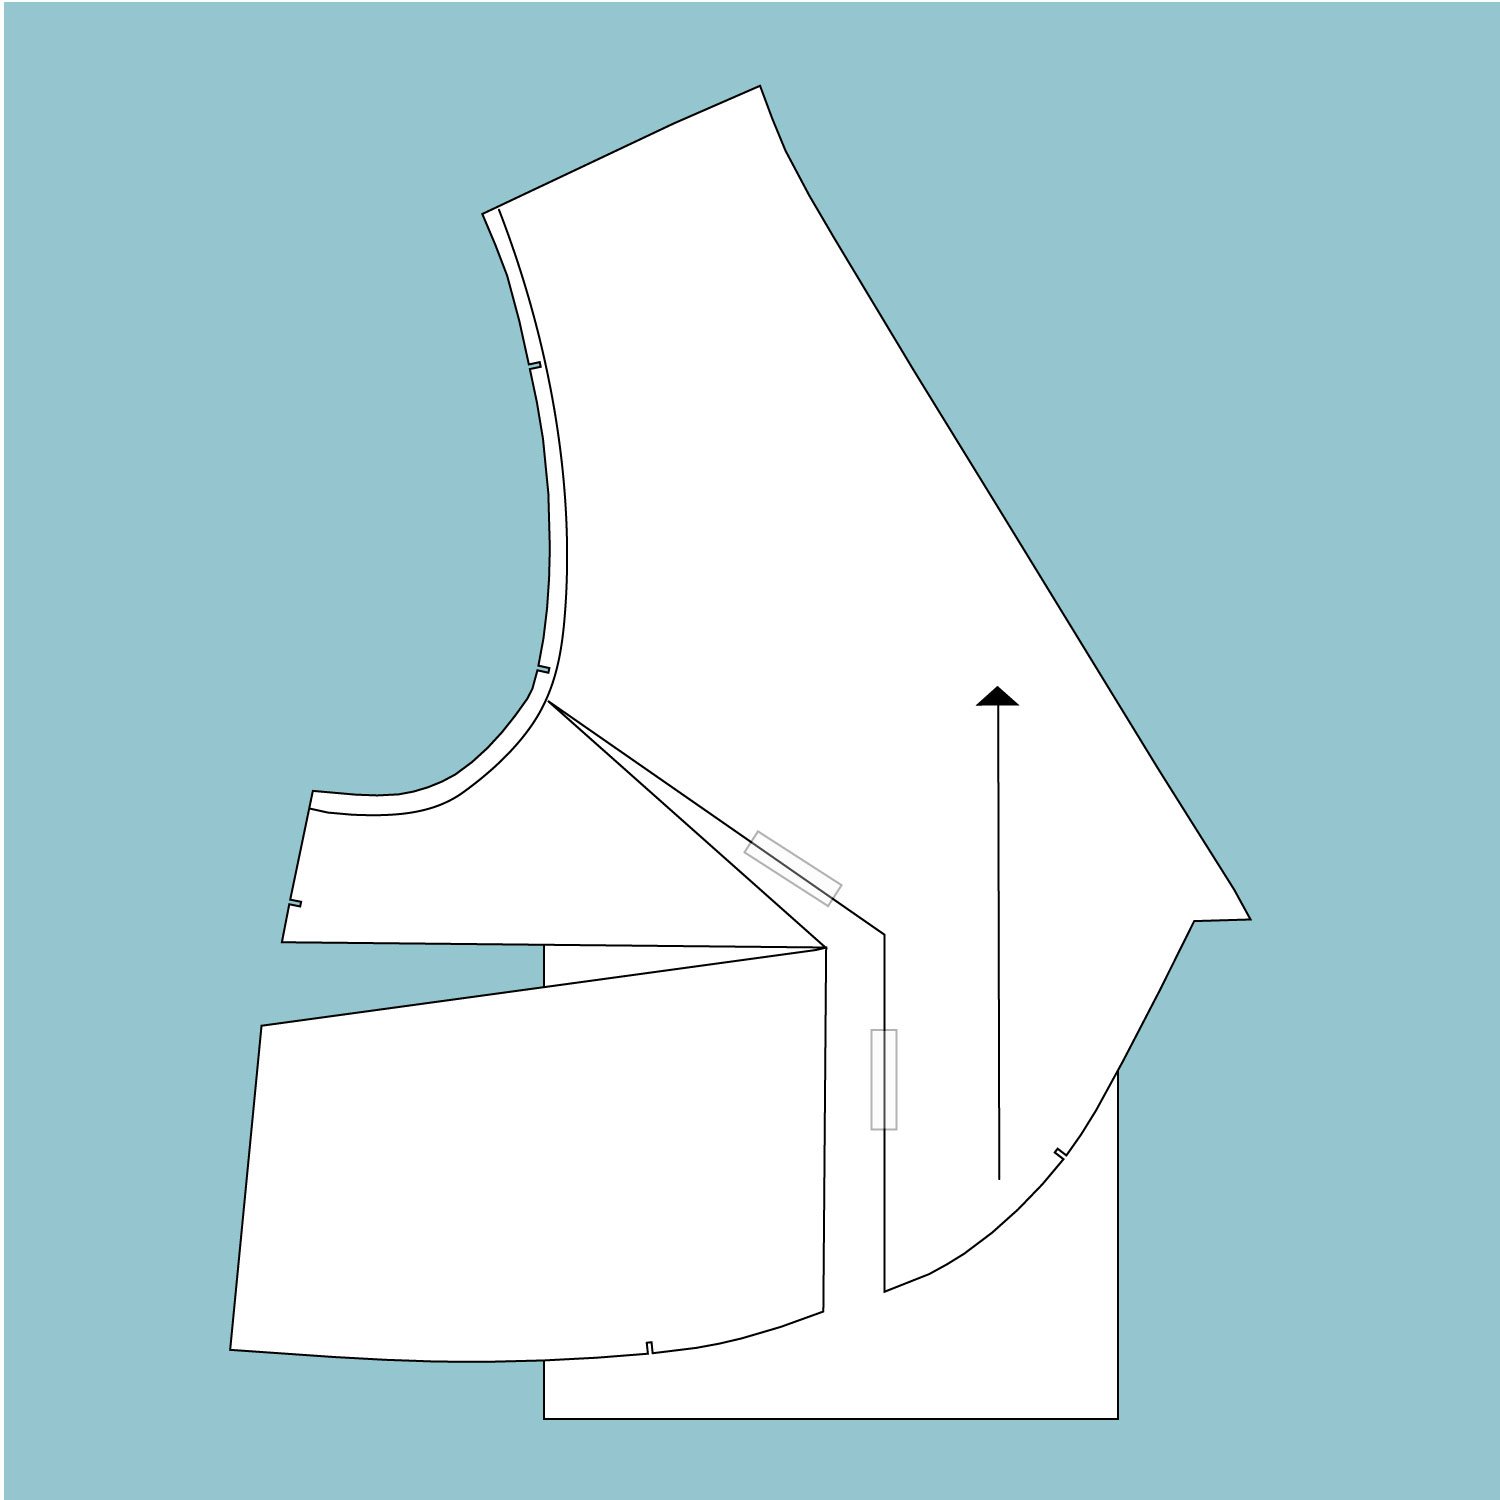
This diagram shows where to mark the lines on the cap sleeve version of the sewing pattern.

STEP 1: Mark the stitchline at the armscye by drawing a line 1.5cm in from the edge of the sewing pattern. Then mark Line A by drawing a line from the bustpoint to the side seam.

STEP 2: Draw Line B from the bustpoint to hem, parrallel to the grainline.

STEP 3: Draw line C from the bustpoint to the armscye.

STEP 4: Cut through Line B, starting at the hem, going to the bustpoint and then pivoting into Line C. Cut as far as the armscye stitch line. Then cut a little notch at the armscye seam allowance (where Line C meets it) to create a hinge.

STEP 5: Cut through Line A from the side seam to the bustpoint.
STEP 6: Place a piece of paper under your pattern piece and tape one side of the cut opening down.

STEP 7: Divide into two, the amount that you would like to increase the bust by. Then draw a line on the extra paper this distance away from and parallel to Line B. This is your increase line.

STEP 7: Close Line A and tape it in place.

STEP 9: Draw a smooth line along the increased section and then trim the lower section of the hem. The gathered section which is between the 2 notches, will now be slightly larger. Your sewing pattern is now ready to be toiled!