Fit Tutorial: How to Fix Gaping at the Bust
For the Joelle Dress Sewing Pattern

How to fix gaping at the bust of your
Joelle Dress Sewing Pattern
If you find your Joelle Dress Sewing Pattern has an issue with gaping at the neckline, then the following fit tutorial will help you to fix that.
I’d always recommend making a toile/muslin first so that you can resolve any fitting issues on your sewing pattern.
The instructions in this fit tutorial show how to fix gaping at the side of the bodice neckline, but if you find that the gaping is at the cleavage, then use the same method of pivoting the excess around the bust point and into the gathering.
Before using the pivoting method, first check to see if you need to reduce the width of the dress at the side seam.

STEP 1. First check the fit of your bodice at the side seam and take in there if needed. Then pin the excess gaping from the neckline to the bust point on your toile.

STEP 2. Mark the seam allowance on your FRONT BODICE sewing pattern piece at the neckline (1cm S/A), side seam and base (1.5cm S/A) of the pattern piece.
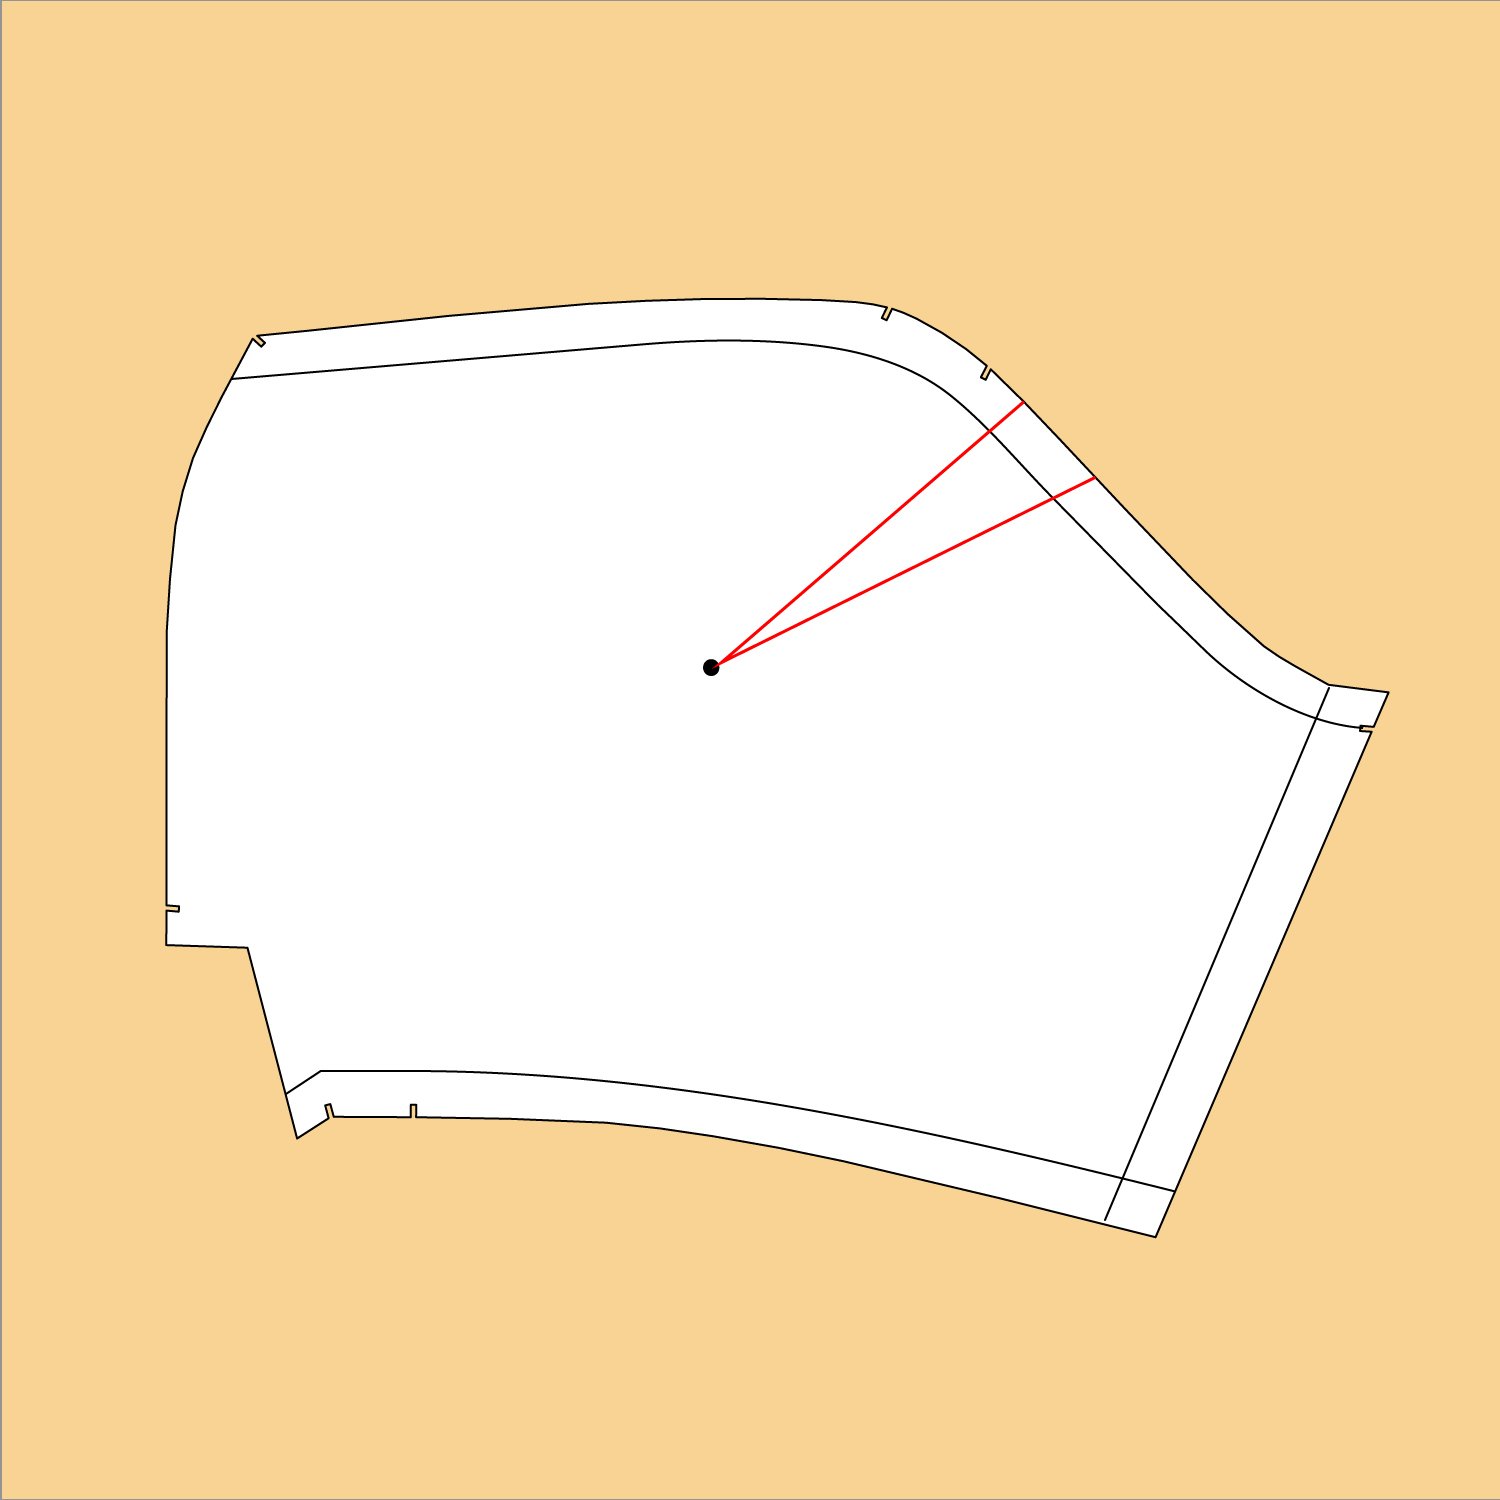
STEP 3. Mark the gaping section on your sewing pattern piece.

STEP 4. Draw a horizontal line from the bust point to the centre front.

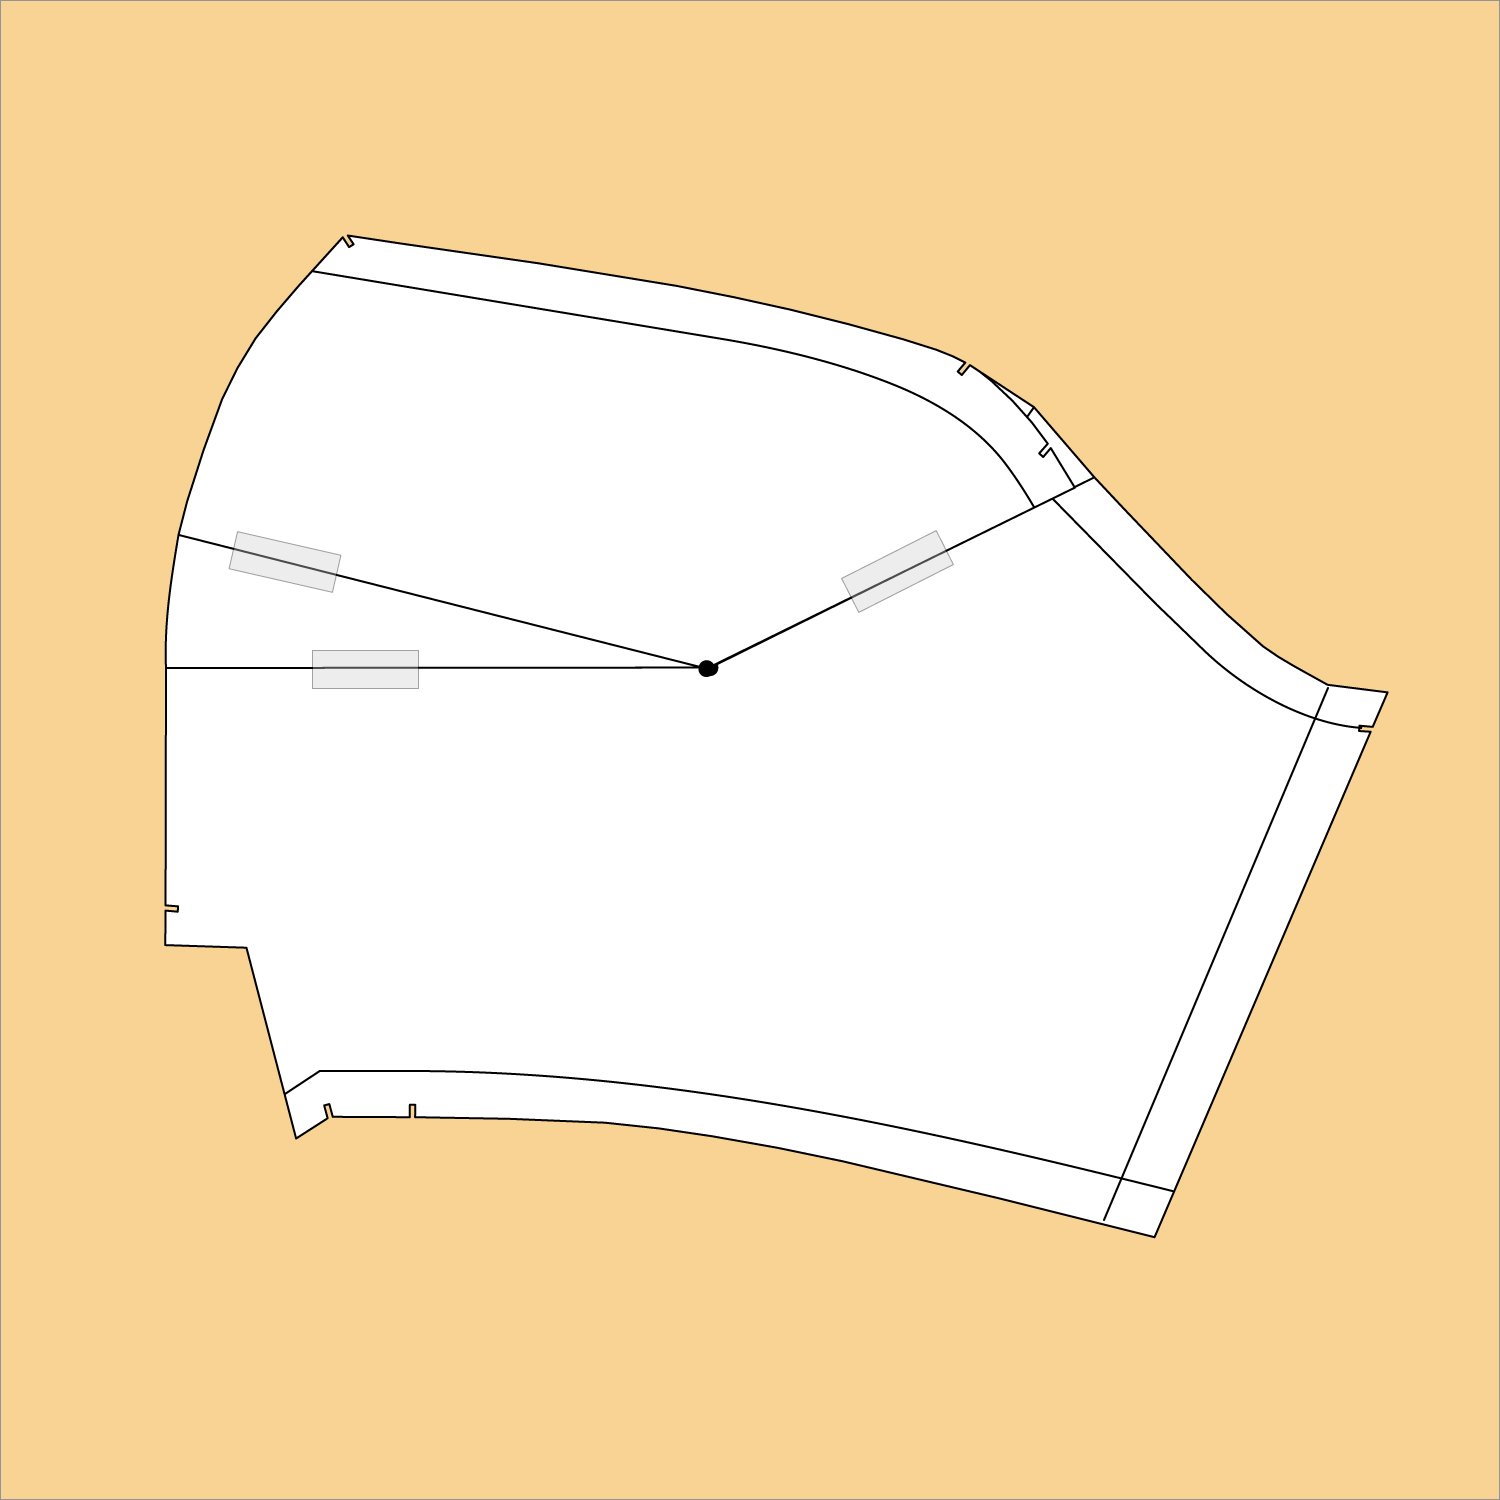
STEP 5. Cut open this horizontal line, just up to the bust point. Then cut one of the lines on your gaping section, just up to the bustpoint.

STEP 6. Pivot the sewing pattern piece at the bust point, so that the two lines on your gaping section meet.

STEP 7. Put a piece of paper under your sewing pattern piece, then tape the gaping lines together and as well as the opened centre front. Draw a slightly curved line to fill in the centre front opening. Then a line to fill in the section by the gaping lines.
STEP 8. Cut out your new sewing pattern front bodice and it’s now ready to be toiled!